SUMMARY
- Collision repair follows a structured process designed to restore your vehicle safely and correctly.
- Repairs begin with a detailed inspection and repair plan before damaged parts are removed.
- Technicians inspect for hidden damage, perform structural repairs, replace damaged components, and refinish repaired areas.
- Modern vehicles often require diagnostic scans and ADAS calibration before repairs are complete.
- Final quality inspections help verify that the vehicle is ready to return to the road.
After an accident, many drivers wonder what actually happens once they leave their vehicle at a collision repair facility. While it may seem like repairs simply involve replacing damaged parts and repainting the vehicle, modern collision repair is a detailed process that combines engineering, technology, manufacturer repair procedures, and multiple quality inspections. Every stage is designed to restore not only the vehicle’s appearance but also its structural integrity and safety systems.
Today’s vehicles are significantly more advanced than those built just a few years ago. High-strength materials, electronic safety features, and integrated driver assistance technologies all require specialized repair methods. Because of this, repairs are completed in a series of carefully planned steps rather than all at once.
For drivers in Spokane Valley, understanding the collision repair process can help set realistic expectations and provide confidence in the work being performed on their vehicle.
Step 1: How Is Your Vehicle Inspected After an Accident?
Every collision repair begins with a comprehensive inspection.
During this stage, technicians evaluate:
- Exterior body damage
- Structural concerns
- Paint damage
- Glass damage
- Wheel and suspension condition
- Dashboard warning lights
The inspection allows technicians to document visible damage, identify potential repair requirements, and prepare an initial repair strategy.
Professional vehicle collision repair begins with a detailed inspection that helps identify both visible and hidden collision damage.
Learn more about vehicle safety from the National Highway Traffic Safety Administration (NHTSA).
Step 2: Why Is Vehicle Disassembly Necessary?
After the initial inspection, technicians begin removing damaged components to access areas hidden behind body panels.
Disassembly helps technicians inspect:
- Structural components
- Reinforcement bars
- Mounting brackets
- Cooling system parts
- Wiring harnesses
- Safety sensor locations
This step often reveals collision damage that was not visible during the initial estimate.
The Insurance Institute for Highway Safety (IIHS) explains how modern vehicle structures are designed to absorb crash forces and protect occupants.
Step 3: How Is the Repair Plan Finalized?
Once hidden damage has been identified, technicians finalize the repair plan.
The completed repair plan may include:
- Replacement parts
- Structural repairs
- OEM repair procedures
- Diagnostic operations
- Paint refinishing
- Quality inspections
If additional damage is discovered, supplemental documentation may be prepared before repairs continue.
The Insurance Information Institute explains how supplemental repairs are commonly incorporated into collision repair claims.
Step 4: What Happens During Structural and Body Repairs?
After repair planning is complete, technicians begin restoring the vehicle’s damaged structure and body panels.
Repairs may include:
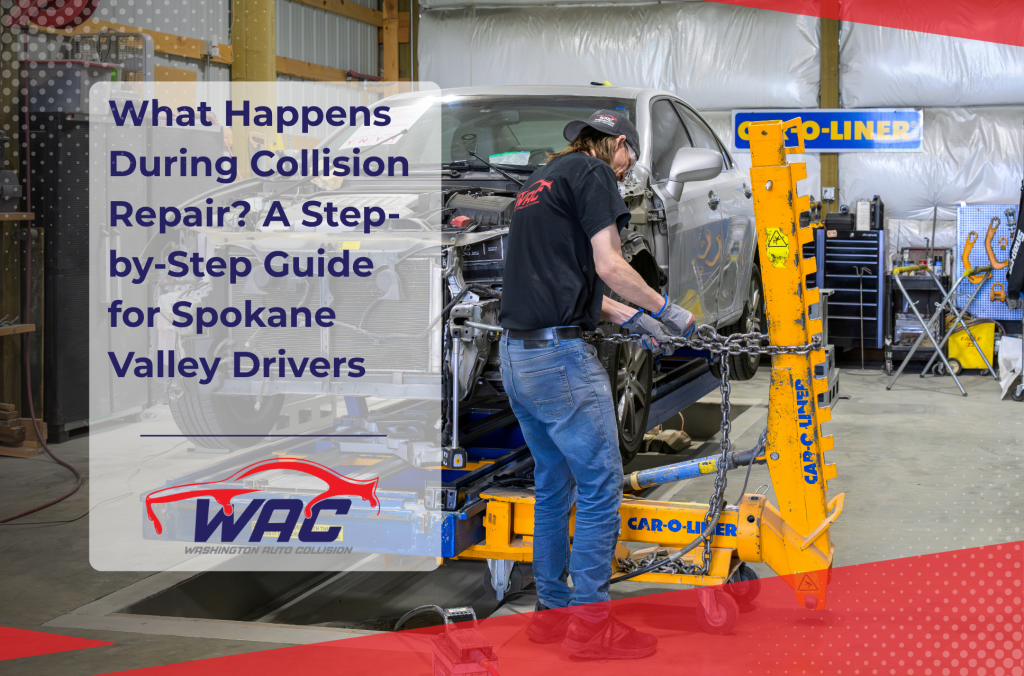
- Structural straightening
- Panel repair
- Panel replacement
- Aluminum repairs
- Welding procedures
- Corrosion protection restoration
The objective is to restore the vehicle according to manufacturer recommendations before cosmetic refinishing begins.
Professional auto body repair shop services help restore damaged panels while maintaining proper alignment, fit, and structural integrity.
The Society of Collision Repair Specialists (SCRS) provides educational information about professional collision repair standards.
Step 5: How Is the Vehicle Repainted?
Once repairs have been completed, technicians begin the refinishing process.
Refinishing may include:
- Surface preparation
- Primer application
- Computerized color matching
- Base coat application
- Clear coat application
- Paint curing
Professional refinishing restores both the appearance of the repaired panels and the protective finish that helps resist corrosion and environmental damage.
The Automotive Service Association (ASA) provides consumer resources about professional automotive repair practices.
Modern automotive refinishing is a highly controlled process designed to produce a durable, factory-quality finish. Before any paint is applied, technicians carefully prepare the repaired surface by cleaning, sanding, and removing any imperfections that could affect the final result.
Proper preparation creates a stable foundation for the primer and paint to bond correctly, helping reduce the risk of peeling, bubbling, or premature wear. Because the quality of the finish depends heavily on surface preparation, technicians take time to ensure each panel is ready before moving to the next stage.
Color matching is another important part of the refinishing process. Although manufacturers assign paint codes to every vehicle, factors such as sunlight, weather exposure, and normal aging can slightly change the appearance of the original finish over time.
To achieve the closest possible match, technicians often use computerized color-matching technology along with test panels to fine-tune the paint before it is applied. This process helps the repaired area blend naturally with adjacent panels, creating a more seamless appearance once the repair is complete.
After the base coat and clear coat have been applied, the vehicle is placed in a controlled environment where the finish can cure properly. Once curing is complete, technicians inspect the repaired panels for color consistency, gloss, texture, and overall finish quality. If necessary, the surface is polished to achieve a smooth, uniform appearance that closely matches the rest of the vehicle.
This careful refinishing process not only restores the vehicle’s appearance but also rebuilds the protective coating that helps defend against moisture, road debris, ultraviolet exposure, and corrosion, contributing to the vehicle’s long-term durability after collision repairs.
Step 6: Why Are Diagnostic Scans and ADAS Calibration Important?
Many modern vehicles require electronic inspections before repairs are considered complete.
Depending on the repairs performed, technicians may complete:
- Pre-repair scans
- Post-repair scans
- ADAS calibration
- Sensor verification
- Electronic system testing
- Fault code verification
Drivers can learn more about ADAS calibration and why modern vehicle safety systems often require calibration after collision repairs.
The I-CAR OEM Information Portal provides manufacturer repair information supporting diagnostic and calibration procedures.
Today’s vehicles rely on dozens of electronic control modules that communicate continuously to support critical safety and driver assistance features. During a collision, even if there is no obvious damage to electronic components, the impact can affect sensors, cameras, radar units, wiring connections, or control modules located throughout the vehicle.
Diagnostic scans help technicians identify stored fault codes, communication errors, and system irregularities that may not trigger a dashboard warning light but still require attention before the repair is complete.
ADAS calibration is equally important because many advanced safety features depend on precise sensor alignment. Systems such as forward collision warning, automatic emergency braking, lane departure warning, adaptive cruise control, and blind spot monitoring rely on cameras and radar sensors being positioned exactly as intended by the manufacturer.
If repairs involve replacing a windshield, bumper, mirror, suspension component, or structural part, these sensors may need to be recalibrated to ensure they function accurately. Following manufacturer procedures helps restore these systems to their intended operating specifications.
After repairs and calibrations are complete, technicians perform post-repair scans and system verification to confirm that electronic modules communicate properly and that any collision-related fault codes have been resolved.
This final verification process helps ensure the vehicle’s electronic systems work together as designed before it is returned to the customer. By combining diagnostic scanning, manufacturer-recommended calibrations, and thorough system testing, collision repair professionals can address hidden electronic issues that may not be visible during a physical inspection, helping restore the vehicle’s safety, reliability, and overall performance after an accident.
Step 7: What Happens Before Your Vehicle Is Returned?
Before delivery, technicians perform a comprehensive quality inspection to verify the repairs have been completed properly.
Final inspections may include:
- Panel alignment verification
- Paint quality inspection
- Electronic system verification
- ADAS confirmation
- Road testing when appropriate
- Vehicle cleaning
These inspections help ensure the repaired vehicle meets quality standards before it is returned to the customer.
Drivers can also learn more about Washington Auto Collision and the company’s commitment to quality workmanship, customer communication, and thorough repair processes.
The National Institute for Automotive Service Excellence (ASE) provides consumer information about quality automotive repairs.
Frequently Asked Questions
How long does collision repair usually take?
Repair time depends on the extent of the damage, parts availability, insurance approvals, and any hidden damage discovered during disassembly.
Why does my vehicle need to be disassembled?
Disassembly allows technicians to inspect hidden structural and mechanical components that cannot be evaluated during a visual inspection.
What happens if additional damage is discovered?
Technicians document the newly identified damage, prepare a supplemental estimate if necessary, and communicate with the insurance company before continuing repairs.
Why are diagnostic scans important?
Diagnostic scans identify hidden electronic issues and help verify that vehicle systems function properly after repairs.
Will my vehicle receive a final inspection?
Yes. Professional repair facilities perform quality inspections to verify repairs, alignment, paint quality, and system operation before delivery.
Why are OEM repair procedures important?
Manufacturer procedures help ensure repairs follow engineering specifications that support vehicle safety and long-term performance.
Why choose Washington Auto Collision?
Washington Auto Collision combines experienced technicians, OEM-focused repair procedures, advanced diagnostic technology, and comprehensive quality inspections to restore vehicles safely after an accident.
Need Collision Repair in Spokane Valley? Here’s What to Expect
Collision repair is a carefully planned process that involves much more than replacing damaged parts. From the initial inspection through structural repairs, refinishing, diagnostic testing, and final quality inspections, every step is designed to restore your vehicle according to manufacturer recommendations. Understanding this process helps drivers appreciate the work involved in returning a vehicle to a safe and reliable condition after an accident.
If your vehicle has been involved in a collision, visit Washington Auto Collision at 16811 E Sprague Ave, Spokane Valley, WA 99037, United States. Our experienced team provides thorough inspections, advanced repair technology, and customer-focused service to help restore your vehicle with quality, safety, and confidence.